本文转载自派链社区,一个充满无限可能的社区
前面要说的话
现如今,随着区块链发展的越来越快,逐渐也被大众所认知,但是,在大家的眼中,区块链还是一个很难的东西,导致大家首先在心里就有了一些抵制,认为非科班出身的人是不可能从事区块链相关工作的,其实,大家在这里就有了一个误区,难道你必须知道亚马逊的 AWS 内部原理,你才能使用它吗?我也非纯技术出身,我写这篇文章的主要目的是为了告诉大家,每个人都可以自己动手去尝试,也许你就会打开新世界的大门,同时也希望区块链圈子中多一些静下心来安静学习的人,给自己一个沉淀的机会。制作DAPP流程
环境搭建
首先,我们的搭建环境是基于Ubuntu系统的,所以你需要去安装一个Ubuntu的系统,可以安装在虚拟机里,这里建议大家安装版本号为16.04.4的。镜像文件和容易在网上找到,这里我就不再过多叙述了。安装geth
sudo apt-get install software-properties-common
sudo add-apt-repository -y ppa:ethereum/ethereum
sudo apt-get update
sudo apt-get install Ethereum测试安装
geth —help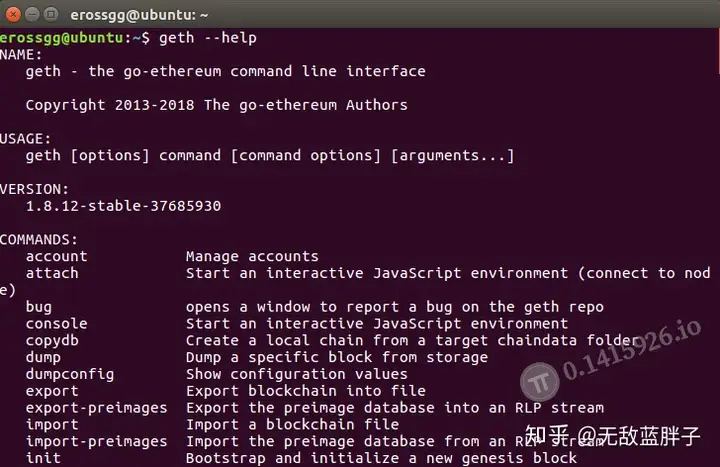
安装solc
Solidity,类JavaScript,这是以太坊推荐的旗舰语言,也是最流行的智能合约语言,我们要想使用Solidity就需要安装solc编辑器。sudo apt-get install solc安装node.js
更新ubuntu软件源
sudo apt-get update
sudo apt-get install -y python-software-properties software-properties-common
sudo add-apt-repository ppa:chris-lea/node.js
sudo apt-get update安装nodejs
sudo apt-get install nodejs
sudo apt install nodejs-legacy
sudo apt install npm更新npm的包镜像源,方便快速下载
sudo npm config set registry https://registry.npm.taobao.orgsudo npm config list全局安装n管理器(用于管理nodejs版本)
sudo npm install n -g安装最新的nodejs(stable版本)
sudo n stable
sudo node -vtruffle和testrpc安装
TRUFFLE和TESTRPC是配套的以太坊开发框架。通过TRUFFLE可以快速的编译和部署合约 并进行测试,同时还有WEB前端交互界面。TESTRPC可以理解为快速生成以太坊测试账号npm install -g truffle
npm install -g ethereumjs-testrpc查看版本号
truffle version好了,到这里我们的环境搭建基本就完成了,下面我们开始配置相关需求文件
以上内容参考:
http://www.ethdocs.org/en/latest/ethereum-clients/cpp-ethereum/index.htmlhttps://www.jianshu.com/p/2b24cd430a7dhttps://ethfans.org/posts/101-noob-intro编写智能合约
truffle init (在新目录中) => 创建truffle项目目录结构
truffle项目目录详解:
contract /:智能合约存放的目录,默认情况下已经帮你创建Migrations.sol合约。migrations /:存放部署脚本test /:存放测试脚本truffle.js:truffle的配置文件修改truffle的配置文件—->> truffle.js 修改至如下代码
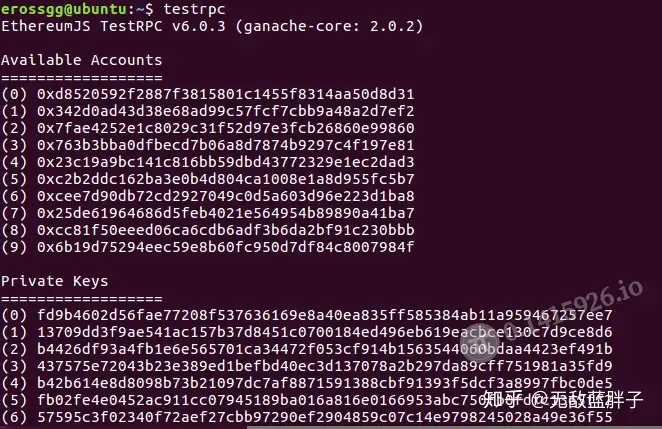
module.exports = { networks: { development: { host: “localhost”, port: 8545, network_id: “*” // 匹配任何network id}}};现在让我们在另一个终端里通过执行testrpc来启动一个节点
会生成如下图所示结果
现在我们进入/ contract /Migrations.sol 修改合同代码 如下
pragma solidity ^0.4.17;contract Migrations { address public owner;uint public last_completed_migration; modifier restricted() {if (msg.sender == owner) _;}function Migrations() public { owner = msg.sender;}function setCompleted(uint completed) public restricted { last_completed_migration = completed;}function upgrade(address new_address) public restricted {Migrations upgraded = Migrations(new_address); upgraded.setCompleted(last_completed_migration);}}编译部署智能合约
修改 / contract/ migrations 路径下的1_initial_migration.js文件 至如下所示
//var Migrations = artifacts.require(“./Migrations.sol”);var Conference = artifacts.require(“./Conference.sol”);module.exports = function(deployer) {//deployer.deploy(Migrations); deployer.deploy(Conference);};然后编译(注意:小编在实际运行当中报错了,后来发现先cd到truffle.js文件路径下再执行编译命令会解决)
$ sudo truffle compile —compile-all编译成功后就会多出一个build目录,我们先不要做任何更改
然后部署
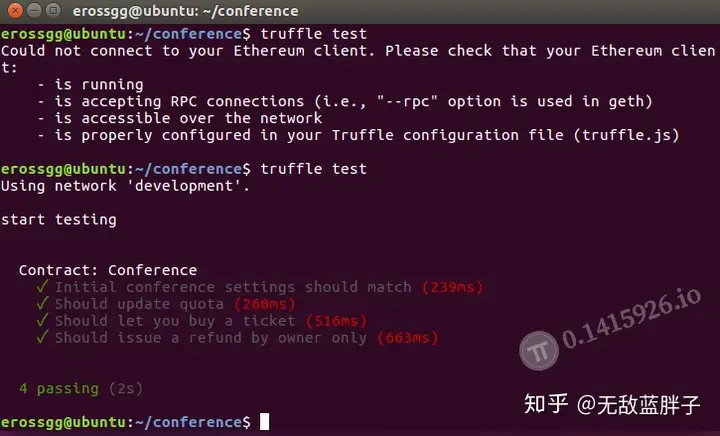
$ sudo truffle migrate –reset这个命令会执行所有migrations目录下的js文件。如果之前执行过truffle migrate命 令,再次执行,只会部署新的js文件,如果没有新的js文件,不会起任何作用。如果 使用—reset参数,则会重新的执行所有脚本的部署。接下来,我们在test目录新增一个conference.js测试文件,代码如下
var Conference = artifacts.require(“./Conference.sol”);contract(Conference, function(accounts) { console.log(“start testing”);//console.log(accounts);var owner_account = accounts[0];var sender_account = accounts[1]; it(“Initial conference settings should match”, function(done) {Conference.new({from: owner_account}).then(function(conference) { conference.quota.call().then(function(quota) { assert.equal(quota, 100, “Quota doesnt match!”); }).then(function() { return conference.numRegistrants.call(); }).then(function(num) { assert.equal(num, 0, “Registrants doesnt match!”);return conference.organizer.call();}).then(function(organizer) { assert.equal(organizer, owner_account, “Owner doesnt match!”);done();}).catch(done);}).catch(done);}); it(“Should update quota”, function(done) {Conference.new({from: owner_account}).then(function(conference) { conference.quota.call().then(function(quota) { assert.equal(quota, 100, “Quota doesnt match!”); }).then(function() { return conference.changeQuota(300);}).then(function() { return conference.quota.call()}).then(function(quota) { assert.equal(quota, 300, “New quota is not correct!”);done();}).catch(done);}).catch(done);}); it(“Should let you buy a ticket”, function(done) {Conference.new({ from: owner_account }).then(function(conference) {var ticketPrice = web3.toWei(0.05, ether);var initialBalance = web3.eth.getBalance(conference.address).toNumber(); conference.buyTicket({ from: accounts[1], value: ticketPrice }).then(function() {var newBalance = web3.eth.getBalance(conference.address).toNumber();var difference = newBalance – initialBalance;assert.equal(difference, ticketPrice, “Difference should be what was sent”);return conference.numRegistrants.call(); }).then(function(num) { assert.equal(num, 1, “there should be 1 registrant”);return conference.registrantsPaid.call(sender_account);}).then(function(amount) {assert.equal(amount.toNumber(), ticketPrice, “Senders paid but is not listed as paying”); return web3.eth.getBalance(conference.address);}).then(function(bal) {assert.equal(bal.toNumber(), ticketPrice, “Final balance mismatch”);done();}).catch(done);}).catch(done);}); it(“Should issue a refund by owner only”, function(done) {Conference.new({ from: owner_account }).then(function(conference) {var ticketPrice = web3.toWei(.05, ether);var initialBalance = web3.eth.getBalance(conference.address).toNumber(); conference.buyTicket({ from: accounts[1], value: ticketPrice }).then(function() {var newBalance = web3.eth.getBalance(conference.address).toNumber();var difference = newBalance – initialBalance;assert.equal(difference, ticketPrice, “Difference should be what was sent”);// Now try to issue refund as second user – should failreturn conference.refundTicket(accounts[1], ticketPrice, {from: accounts[1]});}).then(function() { var balance = web3.eth.getBalance(conference.address);assert.equal(balance, ticketPrice, “Balance should be unchanged”);// Now try to issue refund as organizer/ownerreturn conference.refundTicket(accounts[1], ticketPrice, {from: accounts[0]});}).then(function() {var postRefundBalance = web3.eth.getBalance(conference.address).toNumber();assert.equal(postRefundBalance, initialBalance, “Balance should be initial balance”);done();}).catch(done);}).catch(done);});});运行truffle test查看测试结果,成功如下图所示
编写WEB应用
执行命令
cd ~/conferences
npm init然后默认确定,会生成一个package.json文件
我们修改package.json内容至如下所示
{“name”: “conference”,”version”: “1.0.0”,”description”: “”,”main”: “truffle-config.js”,”directories”: {“test”: “test”},”scripts”: {“test”: “echo \”Error: no test specified\” && exit 1″,”start”: “webpack”,”server”: “webpack-dev-server –open”},”author”: “”,”license”: “ISC”}package.json文件定义了这个项目所需要的各种模块,以及项目的配置信息(比如名称、版本、许可证等元数据)。npm 命令根据这个配置文件,自动下载所需的模块,也就是配置项目所需的运行和开发环境。接下来在conference目录下新建app目录
执行命令如下Cd ~/conference
Mkdir app在app目录下新建index.html文件 如下所示
<!DOCTYPE html><html><head><title>Conference DApp2</title><link href=https://fonts.loli.net/css?family=Open+Sans:400,700,300 rel=stylesheet type=text/css><script type=”text/javascript” src=”http://code.jquery.com/jquery-1.9.1.min.js”></script><script src=”./app.js”></script></head><body><h1>Conference DApp</h1><div class=”section”> Contract deployed at: <div id=”confAddress”></div></div><div class=”section”> Organizer: <input type=”text” id=”confOrganizer” /></div><div class=”section”> Quota: <input type=”text” id=”confQuota” /><button id=”changeQuota”>Change</button><span id=”changeQuotaResult”></span></div><div class=”section”> Registrants: <span id=”numRegistrants”>0</span></div><hr/></body></html>然后在app目录下新建javascripts目录和styleheets目录,分别存放js脚本文件和css样式文件。真正和合约交互的就是脚本文件。
两个脚本我已上传到百度网盘,评论区放出,有需要者自行下载,在这里就不粘贴代码了打包部署web应用
npm install webpack@3.0.0—save-dev
npm install babel-loader —save-dev
npm install babel-core —save-dev
npm install html-loader —save-dev
npm install —save-dev webpack-dev-server@2.11.0npm install html-webpack-plugin —save-dev
npm install truffle-contract —save-dev
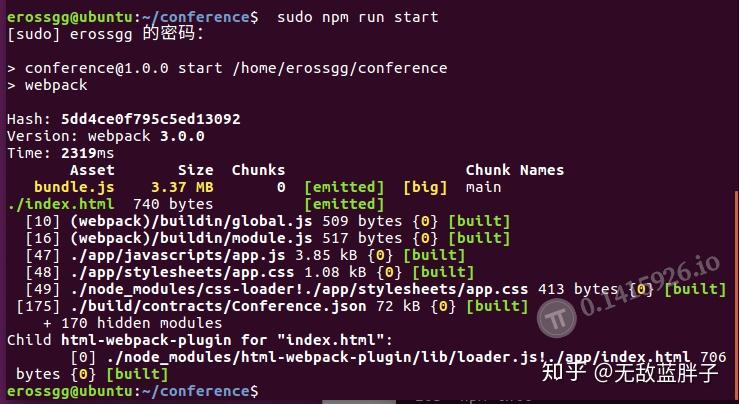
npm install —save-dev style-loader css-loader环境安装好后我们就可以开始打包了
$ sudo npm run start运行结果如下
然后部署
$ sudo npm run server部署成功显示如下
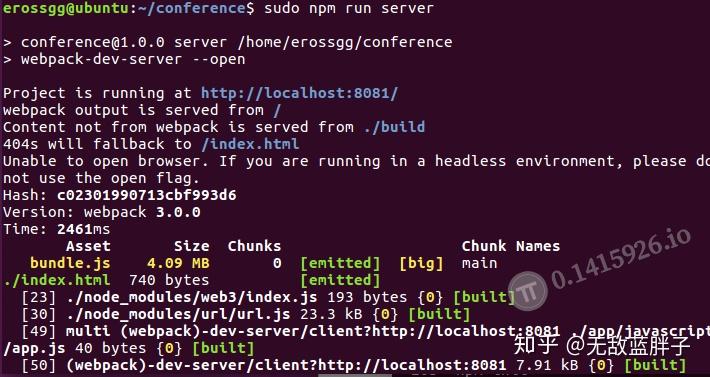
现在来我们浏览器访问http://localhost:8080/
就可以看到成品了

最后要说的话
一个简单的DAPP开发流程就是上面这样,希望大家多耐心揣摩,多动手尝试,仔细思考每一个命令的作用,相信你会有所收获。
发表回复