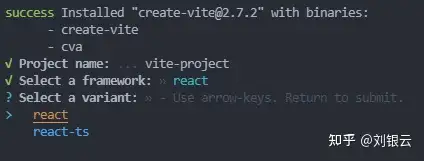
创建Dapp的应用之前,我们使用是vite。首先我们创建一个简单的前端应用:
npx create vite
随后我们使用pnpm安装一下。
pnpm install
启动它:
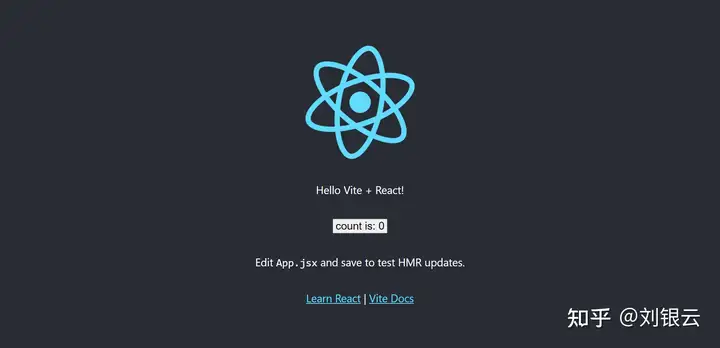
pnpm dev
项目正常启动:
接着导入操作web3的库,我们这里选择ethers这个库,因为它是JavaScript中操作Web3最方便的库,安装:
pnpm install ethers
ok,我们清除掉脚手架里面代码。导入漂亮的UI库:antd。
pnpm install antd
写一个连接小狐狸的按钮:
const ConnectButton = ({ onConnect }) => {
return (
<Button
onClick={async () => {
if (window.ethereum) {
const requestAccounts = await window.ethereum.request({
method: “eth_requestAccounts”,
});
if (requestAccounts) {
const provider = new ethers.providers.Web3Provider(window.ethereum);
const signer = provider.getSigner();
React.$provider = provider;
React.$signer = signer;
onConnect(true);
}
} else {
onConnect(false);
}
}}
>
连接小狐狸
</Button>
);
};
function App(){
const [isConnect, setIsConnect] = useState(false);
return (
<div className=”App” style={{ margin: “20px” }}>
<ConnectButton
onConnect={(connect) => {
setIsConnect(connect)
}}
></ConnectButton>
</div>
)
}
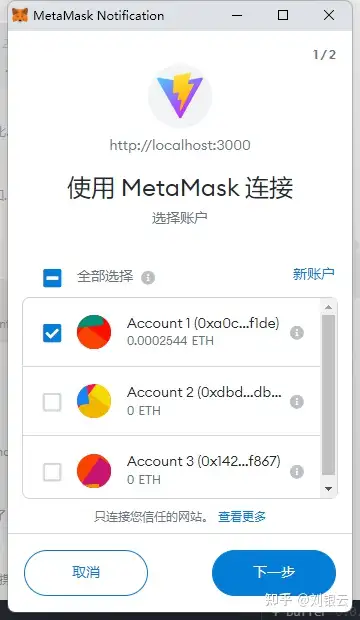
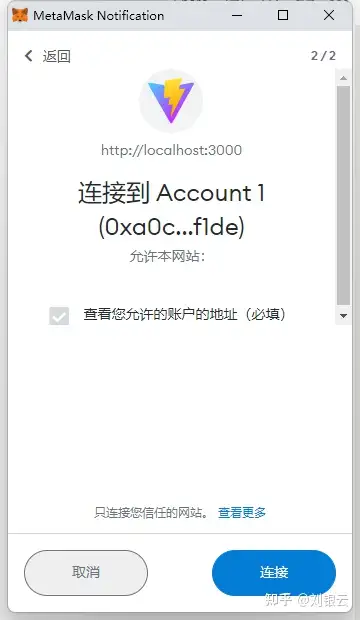
点击按钮就可以看到这个界面,然后授权即可。
我们授权了小狐狸之后,我们要获取自己的账户信息。
例如:地址,余额。
我们写一个组件来获取该用户的信息:
const RenderAccountInfo = () => {
const [accountInfo, setAccountInfo] = useState({ account: “”, balance: “0” });
const [isLoading, setLoading] = useState(false);
useEffect(() => {
const getAccountInfo = async () => {
const [account] = await React.$provider.listAccounts();
if (account) {
const balanceBigInt = await React.$provider.getBalance(account);
const balance = ethers.utils.formatEther(balanceBigInt);
setAccountInfo({ account, balance });
setLoading(true);
}
};
getAccountInfo();
() => {
setLoading(false);
};
}, [accountInfo, isLoading]);
return (
<div>
{isLoading && (
<div>
{accountInfo.account} – {accountInfo.balance} $
</div>
)}
</div>
);
};
接着App这个函数要改造一下。如果连接了小狐狸的话,就不显示按钮,接着显示该信息:
function App() {
const [isConnect, setIsConnect] = useState(false);
useEffect(() => {
if (React.$provider) {
setIsConnect(true);
} else {
setIsConnect(false);
}
}, [React.$provider]);
return (
<div className=”App” style={{ margin: “20px” }}>
{!isConnect ? (
<ConnectButton
onConnect={(connect) => {
setIsConnect(connect);
}}
></ConnectButton>
) : (
<div>
<RenderAccountInfo></RenderAccountInfo>
</div>
)}
</div>
);
}
可能你注意到了ethers.utils.formatEther这个函数, 它是专门转换wei的工具,详情见:https://docs.ethers.io/v5/api/utils/display-logic/#utils-formatEther
部署智能合约
这里的智能合约有点协议的味道,在现实世界中,为了保障可信用化的交易,法律中提出一种合同的有效范本,那么这个范本中签约的就有了一些法律的效应。
智能合约也通用与这种范式,是一种N方共同确认的一种合约。
直接使用truffle创建一个合约:
truffle init
它会在本地创建几个文件夹,分别是:
contracts – 你编写的合约migrations – 迁移到链上的脚本truffle-config.js – truffle的配置文件
然后在contracts这个目录里面添加一份合约:
// SPDX-License-Identifier: MIT
pragma solidity >=0.4.22 <0.9.0;
contract TodoList {
string content = “”;
event observerContentChange(string content);
function getContent() public view returns (string memory) {
return content;
}
function setContent(string memory _content) public {
emit observerContentChange(content);
content = _content;
}
}
注意: pragma是必填的一个关键字,它决定了这个合约的版本,而且合约的版本并不相同。
之后就是部署这个合约了,不过部署合约之前,需要写一个部署脚本进行部署的。
在migrations这个文件夹下新建: deploy_todo.js这个脚本。
脚本的内容如下:
const TodoList = artifacts.require(“TodoList”); // 合约的名字
module.exports = function (deployer) {
deployer.deploy(TodoList);
};
命令行直接迁移到测试链上即可:
truffle migrate
输出的命令是这样子的:
Compiling your contracts…
===========================
> Compiling .\\contracts\\Migrations.sol
> Compiling .\\contracts\\Todo.sol
> Artifacts written to E:\\dapp\\eth-test\\build\\contracts
> Compiled successfully using:
– solc: 0.8.10+commit.fc410830.Emscripten.clang
Starting migrations…
======================
> Network name: ganache
> Network id: 5777
> Block gas limit: 6721975 (0x6691b7)
1_initial_migration.js
======================
Replacing Migrations
———————-
> transaction hash: 0x250e6ea76bfcc52728fede373b3da7e192d8d5579aa5f55f6852753eade0f089
> Blocks: 0 Seconds: 0
> contract address: 0xeBa738136e4867d4749Cf15b330D685bC483269A
> block number: 151
> block timestamp: 1641635104
> account: 0xDbD1794A6bdBA76352BB2C1718931B6D09c0Db3E
> balance: 89.71604119999978423
> gas used: 248854 (0x3cc16)
> gas price: 20 gwei
> value sent: 0 ETH
> total cost: 0.00497708 ETH
> Saving migration to chain.
> Saving artifacts
————————————-
> Total cost: 0.00497708 ETH
2_deploy_todo.js
================
Replacing TodoList
——————–
> transaction hash: 0x8f0f959ea236ecf72b8834e352e6928de4602c0401bba7d1431b66dc9ac3c6f5
> Blocks: 0 Seconds: 0
> contract address: 0x826153d0952cf31498736D8133Be8F83f2Da9FCD
> block number: 153
> block timestamp: 1641635105
> account: 0xDbD1794A6bdBA76352BB2C1718931B6D09c0Db3E
> balance: 89.70899371999978423
> gas used: 309861 (0x4ba65)
> gas price: 20 gwei
> value sent: 0 ETH
> total cost: 0.00619722 ETH
> Saving migration to chain.
> Saving artifacts
————————————-
> Total cost: 0.00619722 ETH
Summary
=======
> Total deployments: 2
> Final cost: 0.0111743 ETH
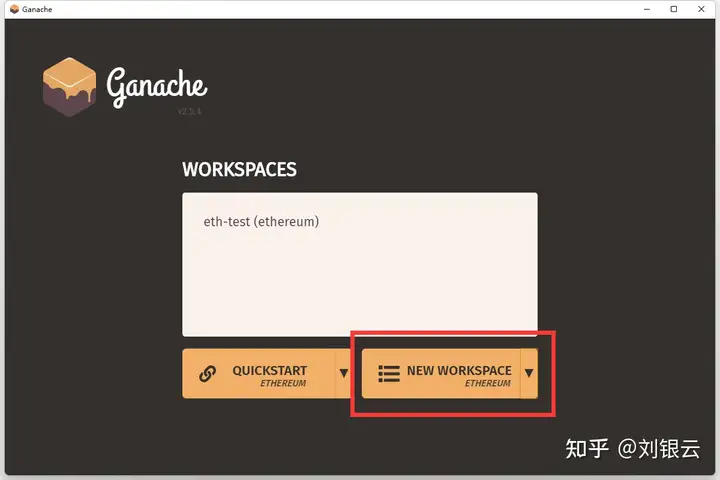
接着我们使用ganache这个软件导入truffle,就能自动生成账户等信息。
网址是:https://trufflesuite.com/ganache/
下载好了之后,新建一个工作站:
然后点击:
选择truffle.json即可:
我们就能看到账号:
ok,接着我们投入到前端的编写中。
因为我们使用ganache这个本地测试链用的方式开发,那么我们的网页也需要做出相应的改变。将连接的provider改成:
const provider = new ethers.providers.JsonRpcProvider(“<HTTP://127.0.0.1:7545>”);
然后赋值一个全局React变量:
const signer = provider.getSigner();
React.$provider = provider;
React.$signer = signer;
接着载入我们写好的合约,不过首先要找到net id找到这个合约的地址,还是封装一个按钮。
把合约的abi加入进去一下即可。
import TodoList from “./../build/contracts/TodoList.json”
const LoadContractButton = ()=>{
return (
<div>
<Button
onClick={async () => {
try {
const { chainId } = await React.$provider.getNetwork()
const { address } = TodoList.networks[chainId];
const TodoContract = new ethers.Contract(
address,
TodoList.abi,
React.$provider
);
React.$TodoContract = TodoContract;
onLoad(true);
} catch (e) {
onLoad(false);
}
}}
>
载入合约
</Button>
</div>
);
}
我们看到了一个简单的载入按钮:
接着将App这个函数修改一下,让它在载入了合约之后。能显示合约中某一个值,我们使用一个组件来显示。
具体的写法可以参考这样:
const ContractContent = () => {
const [content, setContent] = useState(“”);
const getContentByContract = async () => {
const content = await React.$TodoContract.getContent();
setContent(content);
};
const observerContentChangeEvent = () => {
};
const changeContent = async () => {
const contractSigner = React.$TodoContract.connect(React.$signer);
await contractSigner.setContent(Math.random().toFixed(2).toString());
};
useEffect(
function () {
getContentByContract();
observerContentChangeEvent();
},
[content]
);
return (
<div>
<div>{content}</div>
<Button
onClick={() => {
changeContent();
}}
>
修改值
</Button>
</div>
);
};
我们在contract里面写了一个事件,可以实时检测某一个函数调用的回调函数,有些像WebStock。
其中的这个回调函数就是监听event的啦。
React.$TodoContract.on(“observerContentChange”, (content) => {
console.log(“-> changed content”, content);
});
特别注意的是,修改合约时需要带着该账户的签名。
具体代码的表现是:
const contractSigner = React.$TodoContract.connect(React.$signer);
这个合约的签名就搞定了!
将这两个组件放在App函数里面,就能渲染出来内容。
点击修改值,就能看到数字改变了。




发表回复